Most of us, when we decide to make dog treats, go immediately to the oven. We picture ourselves in a cozy kitchen, flour on our hands, cookie cutters in seasonal shapes, the whole picture. Then we realize it’s a Tuesday evening, the sink is still full of dishes, and preheating anything feels like a commitment we’re not ready to make.
Here’s the thing: your dog does not care whether their treat came out of an oven, a fridge, or a mixing bowl you left on the counter for ten minutes. What they care about is the treat. Full stop.
I figured this out after spending way too long on a batch of baked peanut butter biscuits that took an hour, dirtied every bowl I own, and ended up being slightly burned on the bottom anyway. My dog Mochi ate them enthusiastically. She would have eaten the burned bottoms on their own. That’s when I started exploring no-bake options — and I genuinely haven’t looked back since.
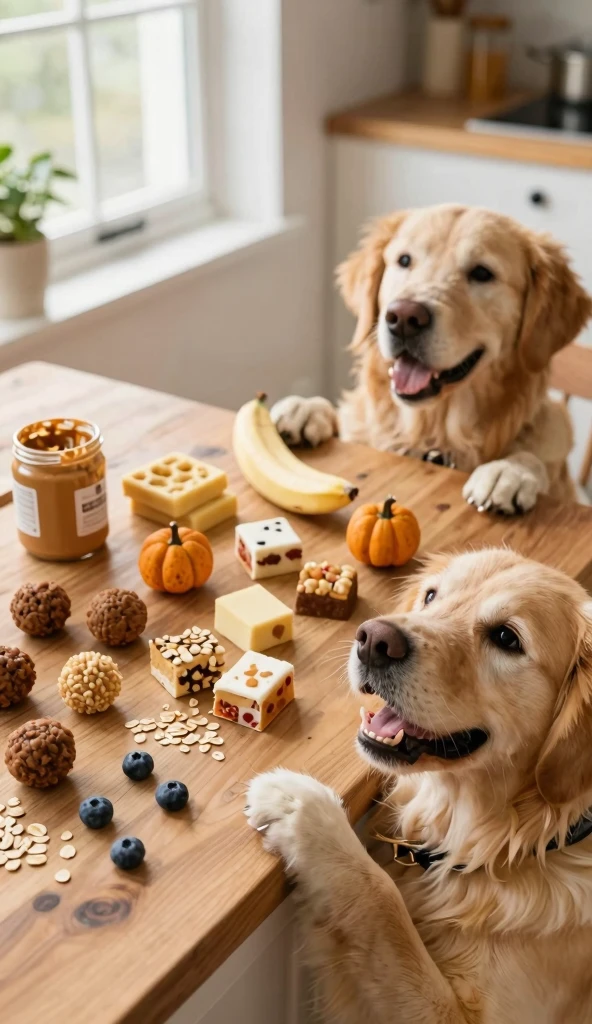
These six recipes are fast, simple, and made from ingredients you probably already have. No oven required. No drama required. Just happy dog.
Why No-Bake Dog Treats Are a Total Game-Changer
Speed is the obvious answer, but it’s not the only one. No-bake treats tend to preserve more of the natural nutrients in your ingredients since you’re not exposing them to prolonged heat. Pumpkin retains its fiber. Yogurt keeps its probiotics. Banana stays rich in potassium.
There’s also the ingredient control factor. According to the American Veterinary Medical Association, pet owners who prepare homemade food and treats have complete visibility into what their pets consume — which matters especially for dogs with allergies, sensitivities, or specific dietary needs.
And honestly? The cleanup is so much easier. No baking tray, no oven grime, no waiting 20 minutes for something to cool before you can even touch it. For a weeknight treat-making session, that alone is worth it.
Table of Contents
What You Need Before You Start
You don’t need anything fancy. A few kitchen basics cover all six recipes:
- Mixing bowls (one or two, nothing special)
- Parchment paper or silicone molds
- A refrigerator or freezer
- Airtight containers for storage
- A fork or potato masher for mashing
That’s the whole list. No stand mixer, no baking sheets, no thermometer.
One thing that applies to every recipe: double-check every ingredient for dog safety before you use it. The big offenders — xylitol, chocolate, grapes, raisins, onions, garlic, macadamia nuts — should never appear in anything your dog eats. When in doubt, leave it out.
1. Peanut Butter Pup Bites
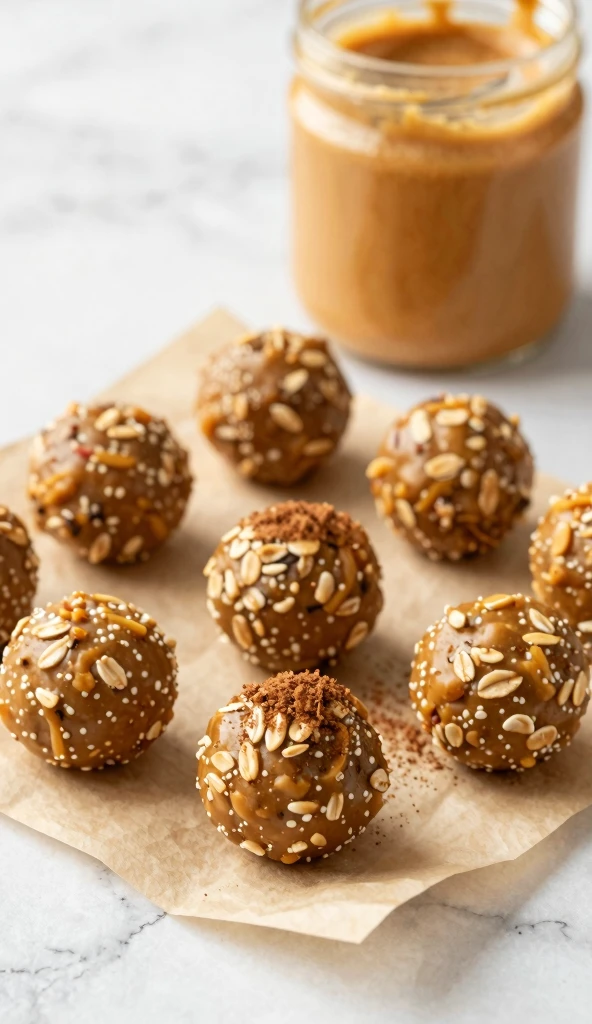
This is the recipe most people start with, and for good reason. Three ingredients, ten minutes of active prep, thirty minutes in the fridge. That’s the whole deal.
Ingredients
- 1 cup rolled oats
- ½ cup peanut butter — xylitol-free, non-negotiable, check the label every time
- ¼ cup unsweetened applesauce
How to Make Them
- Mix all three ingredients in a bowl until a soft dough forms.
- Roll into marble-sized balls.
- Refrigerate for 30 minutes, then serve.
These are ideal as training rewards — small, compact, not crumbly in your pocket. A pinch of cinnamon (dog-safe, genuinely good) takes them up a notch if you want to vary the flavor. Store in the fridge for up to one week. If you’re looking for more ideas on safe flavour additions, check out our guide to dog-safe spices and herbs.
2. Frozen Yogurt Bark
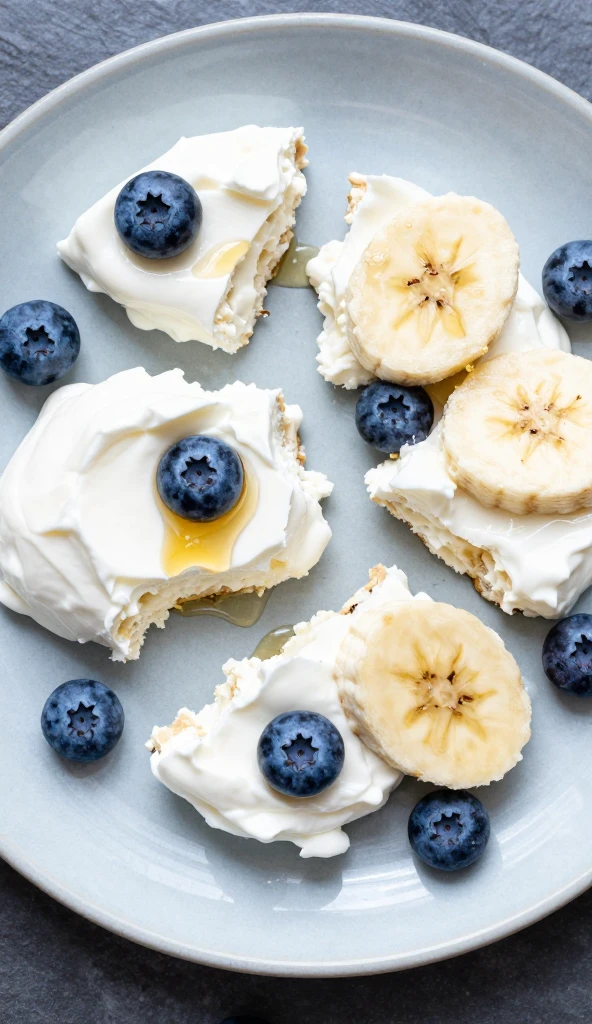
Summer heat, a hot dog (the actual animal, not the food), and a freezer. That is all this takes.
Ingredients
- 1 cup plain Greek yogurt (no added sugar or flavoring)
- ¼ cup blueberries or other dog-safe fruit
- 1 tbsp honey (optional — skip for puppies under one year)
How to Make It
- Spread the yogurt in an even layer on a parchment-lined baking sheet.
- Scatter fruit on top and drizzle with honey if using.
- Freeze for 2–3 hours, then break into rough pieces.
Silicone molds work well here if you want defined shapes. Finely chopped strawberries or banana slices are great alternatives to blueberries depending on what your dog prefers. Store in a freezer bag for up to two weeks.
3. Tuna Fudge

Yes, tuna fudge. No, it is not for you. Yes, your dog will think it belongs in a restaurant.
Ingredients
- 1 can tuna in water, drained
- ½ cup whole wheat flour
- 1 egg
How to Make It
- Mix all three ingredients together until fully combined into a thick paste.
- Press firmly into a small baking dish or silicone mold.
- Refrigerate for at least 1 hour, then cut into small squares.
A fair warning: this smells exactly like what it is, which is canned fish mixed with egg. Open a window. Add a pinch of dried parsley to the mix — it helps with your dog’s breath and cuts the smell slightly. Store in the fridge for up to five days.
4. Sweet Potato Chews

Sweet potatoes are cheap, easy to find, and packed with fiber, vitamin A, and potassium. For dogs who like to chew — and oh, they know who they are — these are deeply satisfying. My couch corner did not survive the puppy phase, but I am fairly convinced that more sweet potato chews might have changed that outcome.
Ingredients
- 1 large sweet potato
- 1 tbsp coconut oil
How to Make Them
- Slice the sweet potato into thin, even strips — about ¼ inch thick.
- Toss lightly with coconut oil.
- Dehydrate in a food dehydrator or air fryer on the lowest setting for 6–8 hours.
No dehydrator? Use your oven on its lowest setting with the door cracked open slightly to let moisture escape. Store in an airtight container for up to two weeks, making these one of the longest-lasting options on this list.
5. Pumpkin Power Balls
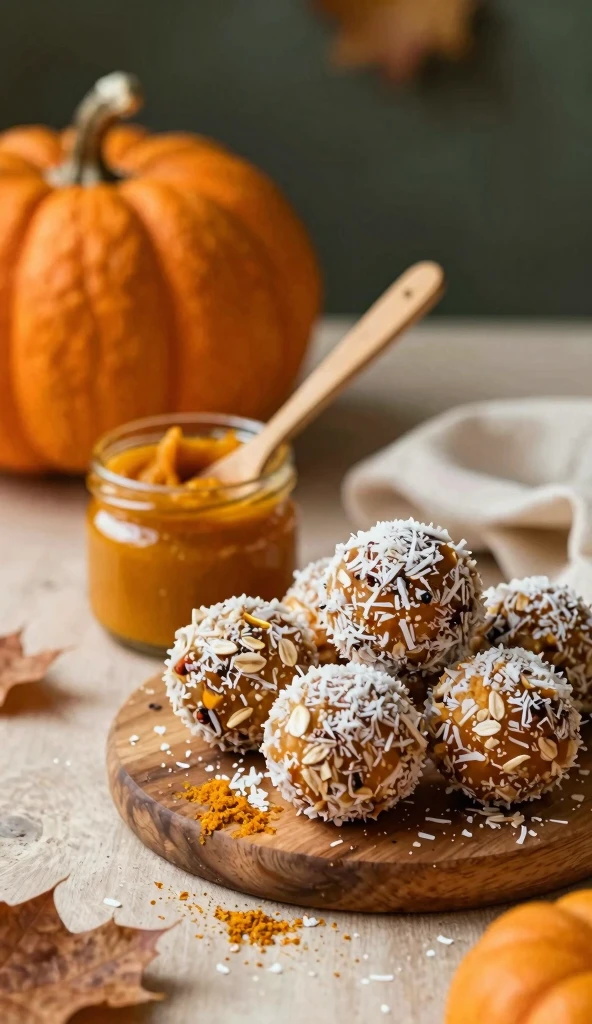
Pumpkin does not need a seasonal excuse. Vets recommend it for digestive upset in dogs year-round — it is high in soluble fiber, which helps regulate both diarrhea and constipation — and dogs genuinely seem to love the taste. Pair it with oats and a bit of shredded coconut and you have a treat that is as practical as it is tasty.
Ingredients
- ½ cup canned pumpkin — plain pumpkin, not pie filling, which contains spices and added sugar
- ½ cup oat flour
- ¼ cup unsweetened shredded coconut
How to Make Them
- Mix all ingredients in a bowl until combined — the dough should be firm enough to roll.
- Roll into small balls, roughly the size of a large marble.
- Refrigerate for at least 1 hour before serving.
These are a solid choice for dogs with sensitive stomachs. A small pinch of turmeric added to the mix has natural anti-inflammatory properties — though keep it to just a pinch, as a little goes a long way. These freeze beautifully for up to two months, so making a double batch is worth the extra five minutes.
| Pet Mom Tip: Always use plain canned pumpkin for dog treats — not pumpkin pie filling. Pie filling contains nutmeg, cinnamon, and sweeteners that are not safe for dogs. The label should say one ingredient: pumpkin. That’s it. |
6. Banana Bonbons
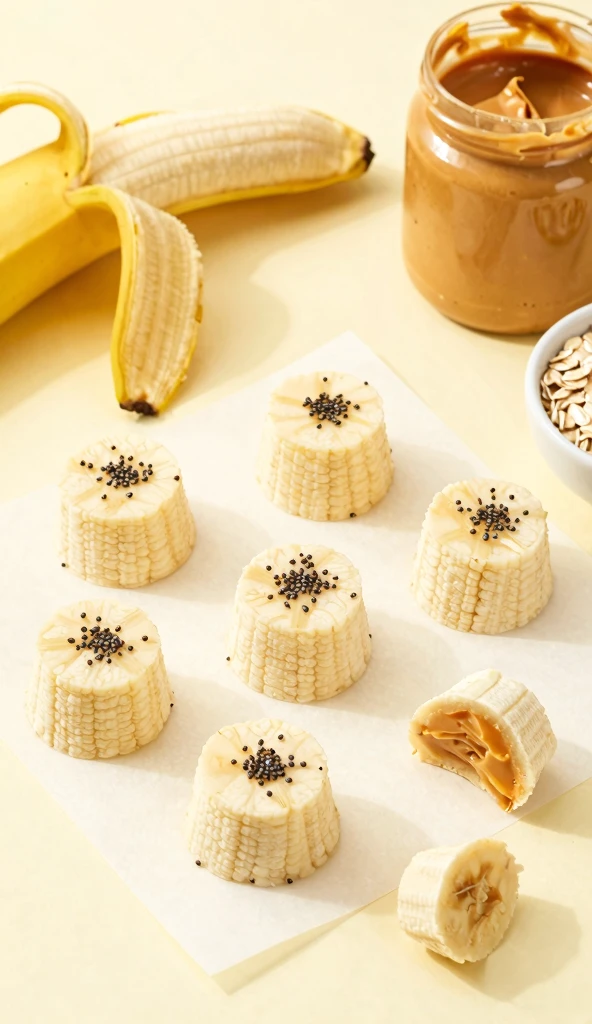
Calling these “bonbons” is a stretch, but they are honestly delightful and your dog will not care about the name. Bananas bring natural sweetness and potassium to the table, and the oats add just enough structure to hold everything together.
Ingredients
- 1 ripe banana (the spottier, the better)
- ½ cup peanut butter — xylitol-free
- ¼ cup rolled oats
How to Make Them
- Mash the banana thoroughly in a bowl — no large chunks.
- Mix in the peanut butter and oats until a uniform dough forms.
- Scoop into small mounds on parchment paper and refrigerate for 1 hour.
Optional: Press a few chia seeds onto the top of each mound before refrigerating for an extra nutrient boost. Store in the fridge for up to five days. Provided, of course, that your dog doesn’t spend the entire time staring at the fridge door with maximum emotional intensity.
Storage Guide: How Long Each Treat Lasts
| Treat | Fridge | Freezer | Best For |
| Peanut Butter Pup Bites | Up to 7 days | Up to 2 months | Training rewards |
| Frozen Yogurt Bark | Not recommended | Up to 2 weeks | Hot weather cooling |
| Tuna Fudge | Up to 5 days | Up to 6 weeks | High-value rewards |
| Sweet Potato Chews | Up to 2 weeks | Up to 2 months | Chewing dogs |
| Pumpkin Power Balls | Up to 7 days | Up to 2 months | Sensitive stomachs |
| Banana Bonbons | Up to 5 days | Up to 2 months | Banana-loving pups |
Silicone storage bags are excellent for freezing individual portions — less waste, easier to grab one at a time. Label everything with the date. Future you will appreciate it.
5 Tips for No-Bake Dog Treat Success
A few things that genuinely make a difference:
- Always verify peanut butter ingredients. Xylitol has appeared in brands that didn’t previously include it, including some labeled as “natural.” Read the label every single time — not just when you first buy a brand.
- Keep portions small. These are treats, not meal replacements. Even healthy ingredients add up in calories, and small dogs especially can hit their daily limit faster than you’d expect.
- Introduce new recipes one at a time. If your dog has any digestive sensitivities, adding three new ingredients at once makes it hard to identify what caused a reaction. Start with one new recipe, give it a few days, then move on.
- Use silicone molds for easier portion control. Mini muffin molds or ice cube trays create consistent sizes, which helps you monitor how much your dog is eating and makes freezing and storing more organized.
- Don’t skip the chill time. No-bake treats firm up in the fridge or freezer, and pulling them out early means they fall apart in your hands. 30 minutes is the minimum for most recipes; an hour is better for anything with more moisture.
Common Questions About No-Bake Dog Treats
Can I substitute ingredients?
Yes, as long as you swap for dog-safe alternatives. Whole wheat flour and oat flour are interchangeable in most recipes. Greek yogurt can replace some wet ingredients. What you cannot do is substitute anything onto the toxic list — no grapes, raisins, onions, garlic, chocolate, macadamia nuts, or xylitol in any form.
How do I know if my dog likes a treat?
Dogs are remarkably transparent about this. Tail wagging, immediate interest, nudging your hand for more, and sitting very deliberately in front of where you stored them are all strong signals. A disinterested sniff and a walk away means they’re not impressed. Try a different recipe next time.
Are these treats suitable for puppies?
Most of these recipes are fine for puppies with a few adjustments. Skip honey for puppies under one year old. Stick to simpler recipes first — the peanut butter bites or banana bonbons are good starting points. Always introduce new foods gradually and watch for any changes in digestion over the first day or two.
Go Make Something Your Dog Will Love
Homemade dog treats don’t need to be complicated, expensive, or time-consuming to be worth making. These six recipes prove that with a mixing bowl, a fridge, and ingredients you probably already have, you can put together something genuinely good for your dog in under 15 minutes of actual effort.
Pick one recipe this week. Make it. Watch your dog’s reaction. That look — the ears up, the full body wag, the intense focus on your hand — is one of the better things about being a pet mom.
Your dog has complete faith that whatever comes out of that kitchen is going to be amazing. Don’t let them down.